Creating a well-organized tool shed can transform your gardening experience, especially if you’re limited on space. I created this post to share creative tool shed layout ideas that maximize every nook and cranny of your small garden storage. If you’ve ever felt overwhelmed by clutter or unsure where to put your compact gardening tools, you’re in the right place!
This guide is perfect for anyone passionate about gardening, whether you’re a seasoned pro or just starting out. You’ll find practical tips and clever ideas specifically tailored for vertical gardening and small spaces. I’ve compiled nine layout strategies that are easy to implement and can make your shed not only functional but also a source of inspiration for your gardening projects.
Get ready to unlock the potential of your tool shed! You’ll discover how to organize your shed for efficiency and accessibility, making your gardening tasks seamless and enjoyable. With these ideas, you can enjoy a clean and organized space that enhances your gardening adventures, turning your shed into a sanctuary of tools and creativity.
Key Takeaways
– A well-planned tool shed layout can significantly improve your gardening efficiency and enjoyment.
– Vertical garden tool racks optimize wall space, making tools easily accessible and neatly stored.
– Multi-tiered shelving units help separate and organize different types of tools and supplies.
– Magnetic tool holders keep metal tools visible and within reach, perfect for quick access.
– Under-bench storage solutions offer hidden space for less frequently used items, maximizing your shed’s capacity.
1. Vertical Garden Tool Racks

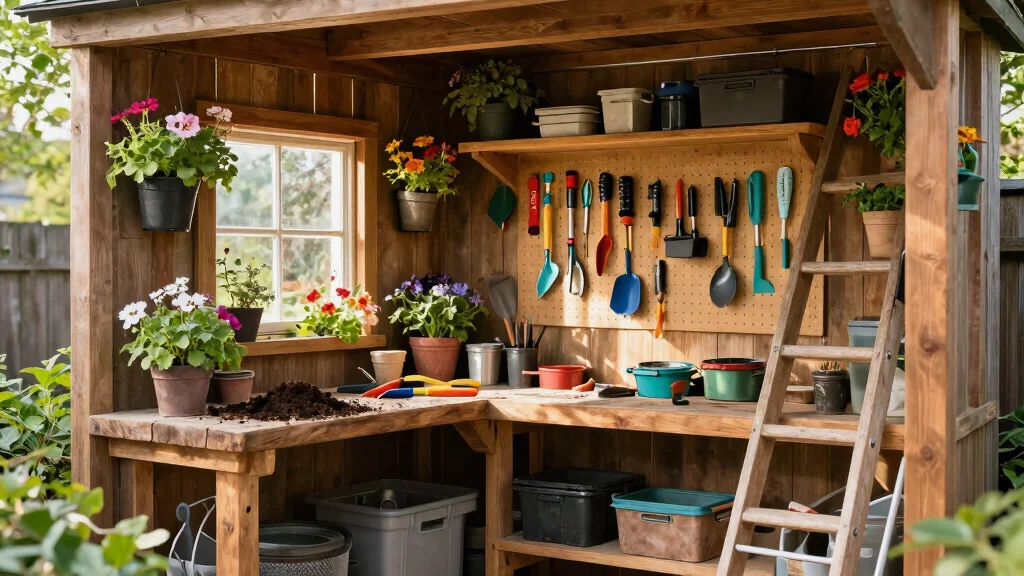
Are you struggling to find space for your tools in a cramped shed? Vertical garden tool racks are here to help! These innovative racks maximize your storage options, keeping your tools neatly organized while saving precious floor space. Available in various materials and styles, they can be customized to fit any shed size and personal taste.
To make the most of these racks, consider adding pegboards or wall-mounted shelves for horizontal tool storage. Incorporate hooks for smaller items like trowels and pruners, ensuring everything is within easy reach. This setup won’t just save space; it will also enhance your gardening experience.
Key features of vertical tool racks:
– Utilize vertical space: Free up floor space for larger items.
– Easy visibility: Quickly find tools without rummaging.
– Customizable options: Tailor racks to fit your collection.
Implementing vertical racks promotes organization and prevents tools from clashing. It’s a simple yet effective solution to keep your small garden storage neat and tidy.
Did you know a simple vertical garden tool rack can free up nearly 40% of floor space in a small shed? With pegboards, wall-mounted shelves, and hooks, your tool shed layout ideas become instantly clearer and faster to navigate.
2. Multi-Tiered Shelving Units

If you’re short on floor space, multi-tiered shelving units are a smart choice for your tool shed. These shelves offer a compact way to store gardening supplies, tools, and pots, ensuring that everything is easy to access when you need it. With various styles available, you can find shelves that suit your aesthetic and functional needs.
To optimize organization, sort your items by type or size on the shelves. Consider mixing open and closed shelving to keep dust away while showcasing your favorite tools. Brightly painted shelves can add a pop of color and cheer to your workspace.
Benefits of multi-tiered shelving:
– Layered organization: Keep supplies sorted by usage frequency.
– Easy access: Quickly grab items without searching.
– Sturdy materials: Support the weight of heavy tools.
With multi-tiered shelving, you create a functional and stylish environment, making your tool shed a more enjoyable place to work.
3. Magnetic Tool Holders

Magnetic tool holders are a fantastic way to keep your shed organized and clutter-free. By using these holders, you can attach your tools to any metal surface, making them easily accessible without taking up valuable space. This solution is both practical and stylish, adding a modern flair to your gardening area.
For best results, install magnetic strips on the sides of shelves or inside the shed door. This allows for efficient tool management while keeping your workspace neat. Ensure the magnets are strong enough to hold heavier items like shovels and pruners.
Advantages of magnetic tool holders:
– Space-saving: Keep tools flat against walls.
– Fast access: Quickly grab what you need.
– Neat presentation: Showcase tools while staying organized.
With magnetic holders, you’ll not only keep your shed tidy but also enjoy a contemporary touch that enhances your gardening experience.
4. Hanging Garden Tool Bags

Hanging garden tool bags offer an excellent solution for storing smaller tools in your tool shed. These bags can be easily hung from hooks or mounted on walls, allowing you to take advantage of vertical space without sacrificing functionality. Plus, they can add a splash of color to your shed!
Choose bags with multiple pockets to keep your tools organized by type. Hang them near your workbench for easy access, making clean-up a breeze after gardening tasks. This setup ensures everything is right where you need it, at your fingertips.
Benefits of hanging tool bags:
– Portable: Easily transport tools to your garden.
– Organized storage: Sort tools for quick access.
– Stylish addition: Select colorful patterns to brighten your shed.
Hanging bags not only enhance organization but also showcase your personality, making your gardening space fun and functional.
5. Compact Folding Workbench

A compact folding workbench is a must-have for small tool sheds, providing a practical workspace without permanently taking up floor space. When you need more room, simply fold it away! This flexibility is perfect for gardeners who want to maximize their usable area.
Position your folding workbench near the shed entrance for easy access. Consider adding overhead shelves for convenient storage of your most-used pots and tools. This setup allows you to work efficiently while keeping everything organized.
Features of a folding workbench:
– Space optimization: Fold it away when not in use.
– Durable design: Choose sturdy materials for outdoor use.
– Multi-purpose: Ideal for potting and other projects.
A folding workbench enhances your shed’s functionality, allowing you to create a productive and organized workspace.
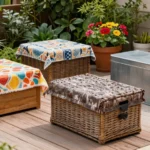
6. Use of Clear Storage Bins

In a compact tool shed, visibility is crucial for organizing your supplies, and clear storage bins are the perfect solution. These bins allow you to quickly find what you need without the hassle of opening multiple containers, saving you time during your gardening tasks.
Organize your bins by category: dedicate one for small tools, another for seeds, and a third for fertilizers. Labeling each bin will further streamline your access. Keeping similar items together creates a tidy environment and ensures everything has a proper place.
Advantages of clear bins:
– Instant visibility: Easily spot what you need.
– Stackable design: Maximize vertical storage.
– Durable material: Easy to clean and long-lasting.
Using clear storage bins transforms your shed into an organized haven, making gardening tasks more enjoyable and efficient.
Dimensions & Size Guide
Standard Sizes & Measurements:
When planning your tool shed layout, knowing the right dimensions is crucial. Most garden tools come in standard sizes, which can help you make informed decisions about your storage solutions. Here are some common sizes to consider:
– Garden Rakes and Hoes: Usually around 54 inches long. Make sure you have at least 5 feet of vertical space for easy storage.
– Shovels: Also about 54 inches long. Keep in mind the width; a shovel head can be around 10 inches wide, requiring space to accommodate it without jamming other tools.
– Hand Tools: These vary, but tools like pruners and trowels are often around 12 inches long. For storage, a drawer or container of at least 3 inches tall should suffice.
– Shelving Units: Standard shelving units can range from 24 to 48 inches in width and 12 to 24 inches in depth. Ensure you have at least 6 inches of clearance above the top shelf for taller items.
Quick Reference Table:
| Size/Dimension | Best for: | Minimum space needed: |
|——————————-|——————————————–|—————————————|
| 54 inches (Garden Tools) | Vertical storage of long-handled tools | 5 feet vertical space |
| 10 inches (Shovel Head) | Horizontal storage on shelves | 12 inches width |
| 12 inches (Hand Tools) | Drawer or container storage | 3 inches height |
| 48 inches (Shelving Unit) | Organizing multiple tools and supplies | 6 feet wide |
Space Planning Tips:
Measuring your space accurately will help you avoid common pitfalls in shed organization. Here are some practical tips to consider:
1. Measure Twice, Cut Once: Always double-check your measurements before purchasing shelves or storage bins. Mistakes can lead to wasted space and money. 📏
2. Leave Room for Movement: Don’t pack your tools too tightly. Aim for at least 2 feet of walkway space if you plan to navigate inside your shed. This makes it easier to access tools without feeling cramped. 🚶♂️
3. Consider Vertical Space: Utilize vertical storage options, like wall-mounted racks or ceiling hooks. This will free up valuable floor space for larger items. Remember, you can store tools vertically, saving you precious square footage. 🌱
4. Account for Overhangs and Doors: When planning your layout, remember to leave extra space for tool doors and shed access. A swinging door can take up more space than you expect, so plan accordingly. 🚪
5. Use Clear Storage Bins: Using clear bins lets you quickly identify contents without digging through each container. Ensure your bins stack easily and have lids to keep dust out.
Pro Tip:
Always prioritize measuring your door width; it’s essential for bringing larger tools or equipment in and out of the shed. If a tool doesn’t fit through the door, it’s essentially useless! 🚀
7. Corner Storage Solutions

Don’t overlook the corners of your tool shed! Corner storage solutions can significantly boost your storage capacity by turning neglected areas into functional spaces for your gardening essentials. By maximizing these spots, you can keep your gear organized and accessible.
Install corner shelves to store pots and tools while keeping frequently used items within reach. Consider tall cabinets for larger items, and rotating units for easy access to items tucked away in the back corners.
How to utilize corners effectively:
– Install corner shelves: Use vertical space wisely.
– Tall cabinets: Store larger items out of the way.
– Rotating units: Access items stored deep in corners easily.
Incorporating corner storage solutions ensures every inch of your shed is utilized efficiently, blending functionality with style.
Fun fact: in small sheds, corner storage can add up to 30% more usable space by turning dead corners into shelves and gear racks. When you keep tools within reach on corner shelves, your tool shed layout ideas suddenly feel livelier and more efficient.
8. Vertical Planter Tool Storage

Why not combine gardening and organization with vertical planter tool storage? This creative solution allows you to keep your tools handy while adding beautiful plants to your shed. It’s a delightful way to blend aesthetics with practicality.
Consider creating DIY vertical planters using wooden pallets or repurposing old furniture. Attach pots for tools alongside those for plants, ensuring everything is within easy reach. This setup allows you to enjoy the beauty of greenery while staying organized.
Ways to implement vertical planter tool storage:
– DIY planters: Use pallets for a rustic look.
– Wall-mounted options: Keep tools and plants close together.
– Color coordination: Match tools with plant colors for visual appeal.
Vertical planter tool storage creates a vibrant and functional environment, making your gardening shed a lovely place to work.
❝ Vertical planters blend tool shed layout ideas with gardening and organization—hang tools with plant pots on sturdy pallets or repurposed furniture, so everything you need stays within reach as you prune and plant. Pro tip: repurpose old items to save space and money! ❞
9. Under-bench Storage Solutions

Maximizing the space beneath your workbench can revolutionize your tool shed organization. Under-bench storage solutions allow you to hide essential items while keeping them readily accessible, promoting a cleaner workspace.
Use bins or drawers that fit perfectly under your workbench to store heavier tools or supplies that don’t need to be displayed. Rolling carts can slide in and out for mobile storage, making it easy to grab what you need.
Storage options to consider:
– Under-bench bins: Store heavy tools out of sight.
– Rolling carts: Add mobile storage for convenience.
– Drawer units: Organize small tools effectively.
Incorporating under-bench storage elevates your shed’s functionality, seamlessly blending organization and accessibility for your gardening tasks.
Conclusion

Embracing these nine practical tool shed layout ideas can transform your small gardening space into a highly functional and organized haven. Each solution is designed to help you maximize every inch available, creating an inviting environment for all your gardening activities. By implementing these strategies, you’ll not only enjoy the practicality of a tidy workspace but also the aesthetic of a beautifully organized tool shed. Ready to get started on your own tool shed transformation?
Note: We aim to provide accurate product links, but some may occasionally expire or become unavailable. If this happens, please search directly on Amazon for the product or a suitable alternative.
This post contains Amazon affiliate links, meaning we may earn a small commission if you purchase through our links, at no extra cost to you.
Frequently Asked Questions
What are the most effective tool shed layout ideas for small spaces?
Start with a simple floor plan and precise measurements. For tool shed layout ideas that work in small spaces, prioritize vertical storage and clear zones for different tasks.
Install wall-mounted shelves and pegboard to hold compact gardening tools within easy reach. Use ceiling hooks or a ceiling-mounted rack for hoses, cords, and lightweight items to free floor space.
Use labeled clear bins on adjustable shelving to improve small garden storage and keep items grouped by use. Consider a narrow rolling cart as a mobile work surface to apply shed design tips. Finally, keep frequently used items near the door to help with maximizing space in tool sheds.
How can I organize compact gardening tools in a small shed to save space?
Start with a pegboard or wall rail system and hang frequently used items. Add a magnetic strip for metal tools and a slat wall for hooks and baskets.
Install adjustable shelving on the side walls for containers, seeds, and gloves. Use labeled clear bins or stackable boxes to group similar tools, so you can see everything at a glance. A shadow board that outlines each tool helps keep clutter at bay and makes efficient shed organization second nature.
Which shed design tips help maximize vertical space for vertical gardening in a tool shed?
Vertical gardening shines in small sheds when you free floor space with high shelves, ceiling racks, and wall rails. Install tall shelving units to hold soil bags, pots, and irrigation gear. Use over-the-door organizers for small items, and hang pouches or small planters on the wall for herbs or vertical garden components.
Keep tools used in vertical gardening—like trowels, pruning shears, and plant ties—on a dedicated vertical rail so everything remains accessible. This is a smart shed design tips approach for maximizing space in tool sheds.
What affordable strategies boost small garden storage in a shed without clutter?
Yes, you can transform a shed on a budget. Start with repurposed pallets and plywood to build vertical shelving. Add a DIY pegboard, then use modular stackable bins for seeds and small parts. Use inexpensive clear storage bins and label them for quick access. Improve lighting and add simple latches or organizers to keep things tidy. These steps enhance small garden storage and are effective shed design tips for maximizing space in tool sheds.
How do I maintain efficient shed organization and protect tools in a busy garden shed?
Create a simple maintenance routine that keeps things orderly. Do a quick inventory at the start of every season and note items that need replacement. Protect tools by drying them after use and applying a light rust-preventive spray. Control humidity with a dehumidifier or moisture-absorbing packs to shield blades and metal parts, and seal gaps around doors to stop drafts. A clean, well-kept shed makes it easier to find compact gardening tools and supports maximizing space in tool sheds even during busy periods.


![21 Genius Garden Hose Storage Ideas [End the Clutter]](http://nestire.com/wp-content/uploads/2026/04/21-Genius-Garden-Hose-Storage-Ideas-End-the-Clutter-150x150.webp)
![15 Dreamy Canopy Tent Wedding Reception Ideas [Elegant]](http://nestire.com/wp-content/uploads/2026/04/15-Dreamy-Canopy-Tent-Wedding-Reception-Ideas-Elegant-150x150.webp)